안녕하세요 효그니에여 ><
오늘은 RecyclerView와 Floating Action Button을 다뤄볼거에요!
이 RecyclerView는 ListView와 비슷한 개념이에요
RecyclerView는 ListView의 문제를 해결하기 위해 개발자에게 더 다양한 형태로 커스터마이징 할 수 있도록 제공된 툴이죠
주요 클래스로는
- Adapter – 기존의 ListView에서 사용하는 Adapter와 같은 개념으로 데이터와 아이템에 대한 View생성
- ViewHolder – 재활용 View에 대한 모든 Sub View를 보유
- LayoutManager – Item항목을 배치
- ItemDecoration – Item항목에서 서브뷰에 대한 처리
- ItemAnimation – Item항목이 추가, 제거되거나 정렬될때 animation
가 있죠.
일단 안스를 켜볼까요?
우선
    implementation 'com.android.support:recyclerview-v7:28.0.0'
    implementation 'com.android.support:design:28.0.0'
이 두개를 implementaition을 해줘요!
implementation 'com.android.support:recyclerview-v7:28.0.0'
는 리사이클러뷰를 사용할 수 있게,
implementation 'com.android.support:design:28.0.0'
는 Floating Action Button을 사용할 수 있게 해줘요!
그리고 activity_main으로 이동할까요?
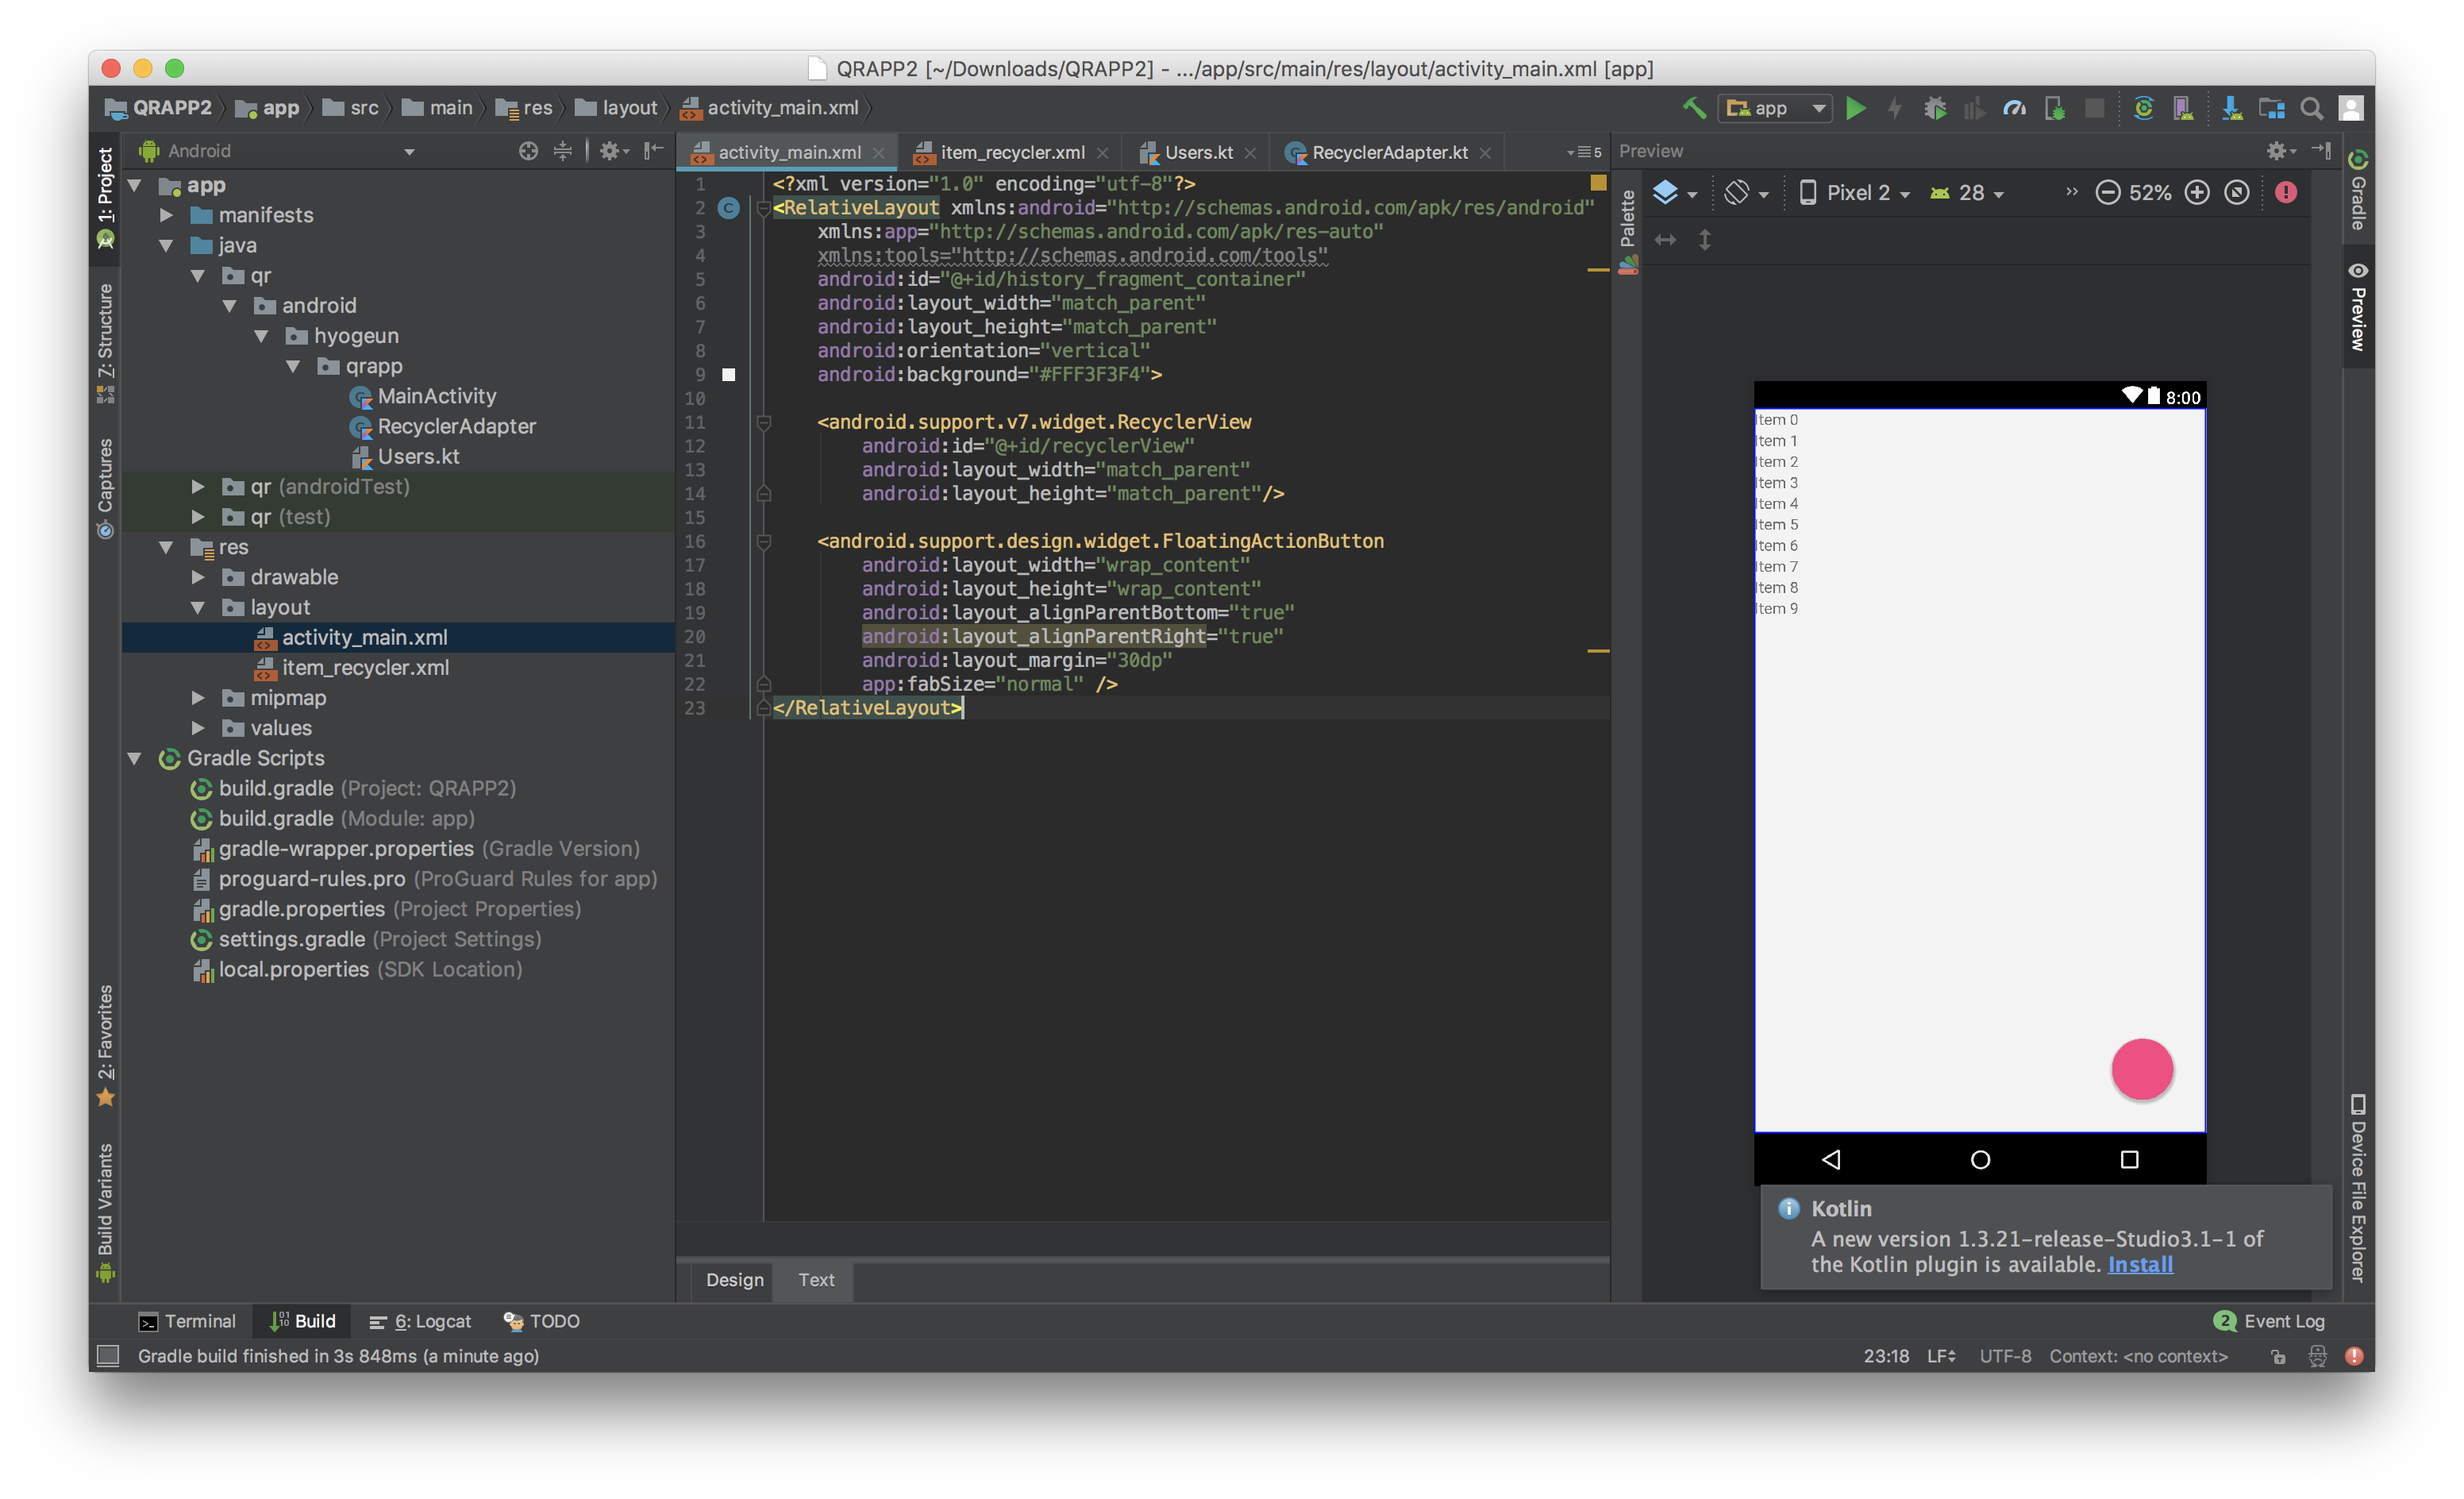
<RelativeLayout xmlns:android="http://schemas.android.com/apk/res/android"
    xmlns:app="http://schemas.android.com/apk/res-auto"
    xmlns:tools="http://schemas.android.com/tools"
    android:id="@+id/history_fragment_container"
    android:layout_width="match_parent"
    android:layout_height="match_parent"
    android:orientation="vertical"
    android:background="#FFF3F3F4">

    <android.support.v7.widget.RecyclerView
        android:id="@+id/recyclerView"
        android:layout_width="match_parent"
        android:layout_height="match_parent"/>

    <android.support.design.widget.FloatingActionButton
        android:layout_width="wrap_content"
        android:layout_height="wrap_content"
        android:layout_alignParentBottom="true"
        android:layout_alignParentRight="true"
        android:layout_margin="30dp"
        app:fabSize="normal" />
</RelativeLayout>
이렇게 생성해줍니다!
그리고
item_recycler를 만들어 볼까요?

<LinearLayout xmlns:android="http://schemas.android.com/apk/res/android"
    xmlns:card_view="http://schemas.android.com/apk/res-auto"
    android:layout_width="match_parent"
    android:layout_height="wrap_content"
    android:orientation="vertical">

    <android.support.v7.widget.CardView
        android:id="@+id/cardview"
        android:layout_width="match_parent"
        android:layout_height="wrap_content"
        android:layout_marginStart="18.3dp"
        android:layout_marginEnd="18.7dp"
        android:layout_marginTop="11dp"
        card_view:cardCornerRadius="17dp"
        android:layout_margin="10dp">

        <RelativeLayout
            android:id="@+id/firstLin"
            android:layout_width="match_parent"
            android:layout_height="wrap_content"
            android:orientation="vertical"
            android:background="#ffffff"
            android:padding="10dp">

            <RelativeLayout
                android:layout_width="match_parent"
                android:layout_height="wrap_content">

                <ImageView
                    android:id="@+id/imageIcon"
                    android:layout_width="52dp"
                    android:layout_height="52dp"
                    android:layout_margin="10dp"
                    android:layout_marginEnd="10dp"
                    android:src="@mipmap/ic_launcher" />

                <LinearLayout
                    android:layout_width="wrap_content"
                    android:layout_height="wrap_content"
                    android:layout_gravity="center"
                    android:layout_marginTop="10dp"
                    android:layout_toRightOf="@+id/imageIcon"
                    android:orientation="vertical">


                    <TextView
                        android:id="@+id/name_tv"
                        android:layout_width="match_parent"
                        android:layout_height="wrap_content"
                        android:textSize="14sp"
                        android:text="가나다" />

                    <TextView
                        android:id="@+id/email_tv"
                        android:layout_width="match_parent"
                        android:layout_height="wrap_content"
                        android:textSize="12sp"
                        android:text="마바사"/>
                </LinearLayout>

                <LinearLayout
                    android:layout_width="wrap_content"
                    android:layout_height="wrap_content"
                    android:layout_marginStart="15dp"
                    android:layout_below="@+id/imageIcon">
                    <TextView
                        android:id="@+id/content_tv"
                        android:layout_width="wrap_content"
                        android:layout_height="wrap_content"
                        android:text="가나다라"
                        android:textSize="15sp"/>
                </LinearLayout>

            </RelativeLayout>


        </RelativeLayout>
    </android.support.v7.widget.CardView>

</LinearLayout>
이렇게 생성해줍니다! (소스는 전에 리스트뷰때와 동일해요!)
그리고 Users 생성!
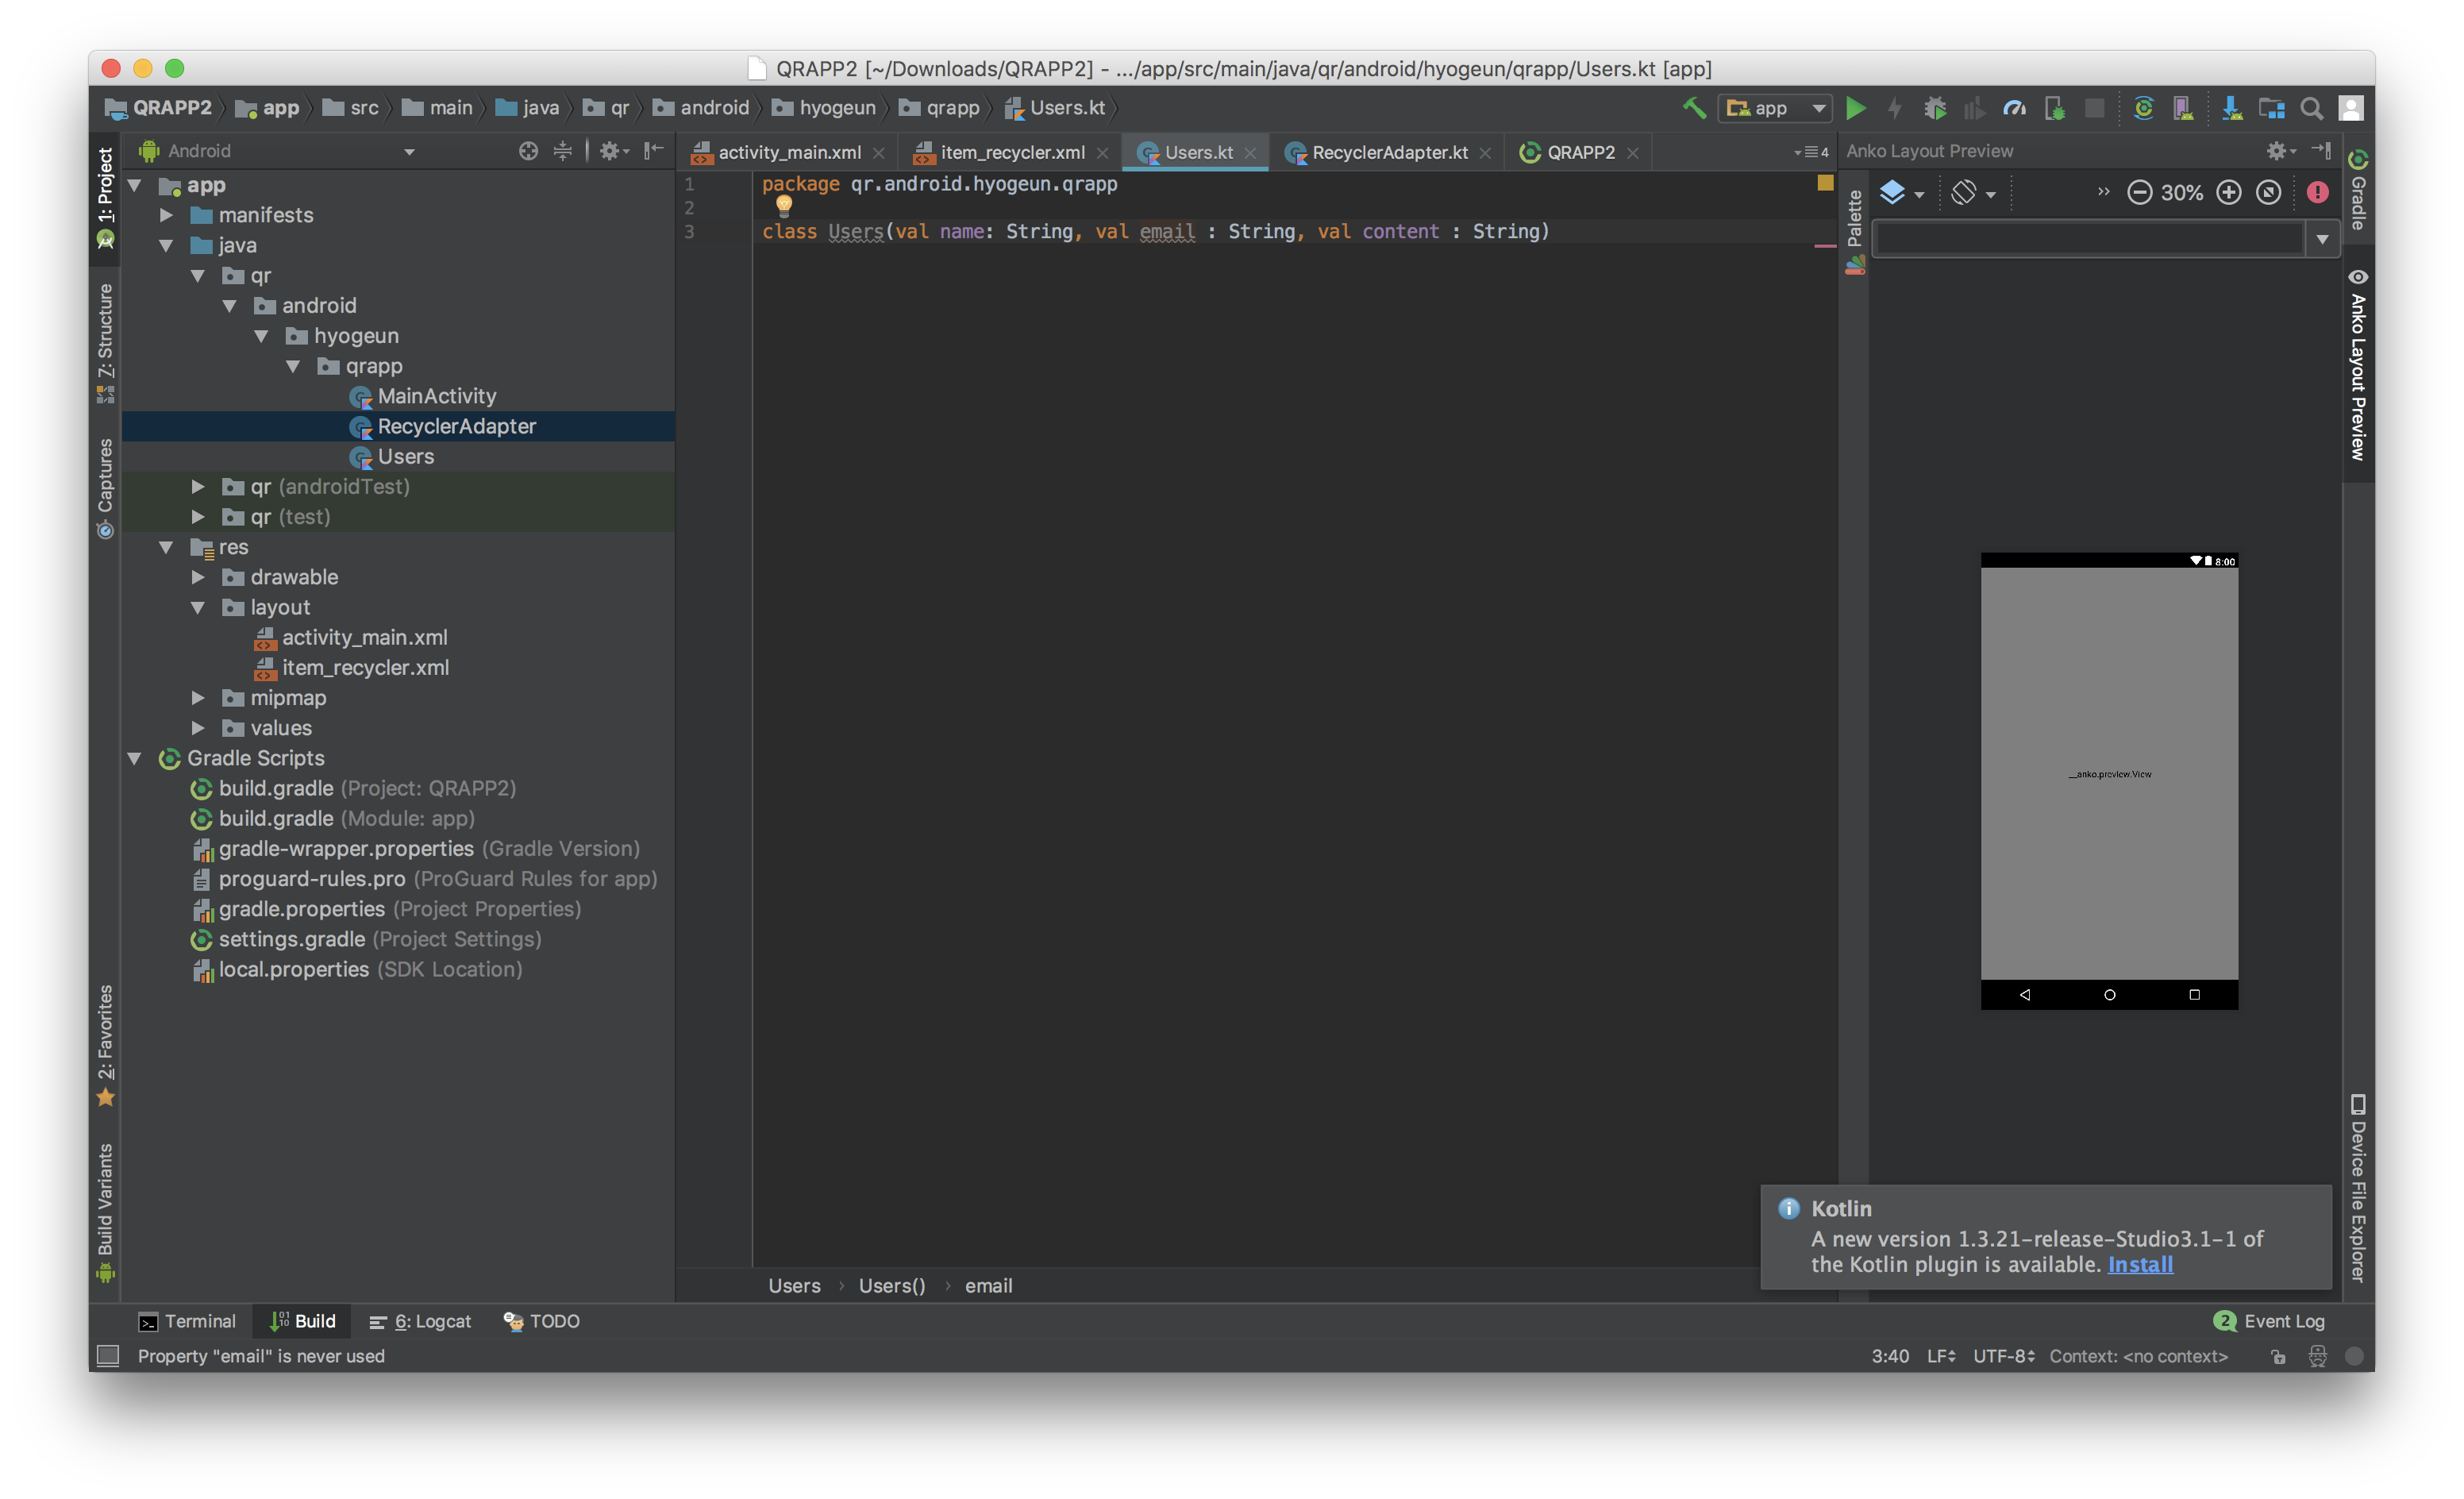
class Users(val name: String, val email : String, val content : String)데이터클래스를 생성해줘요!
그 다음 RecyclerAdapter를 생성해줍시다!
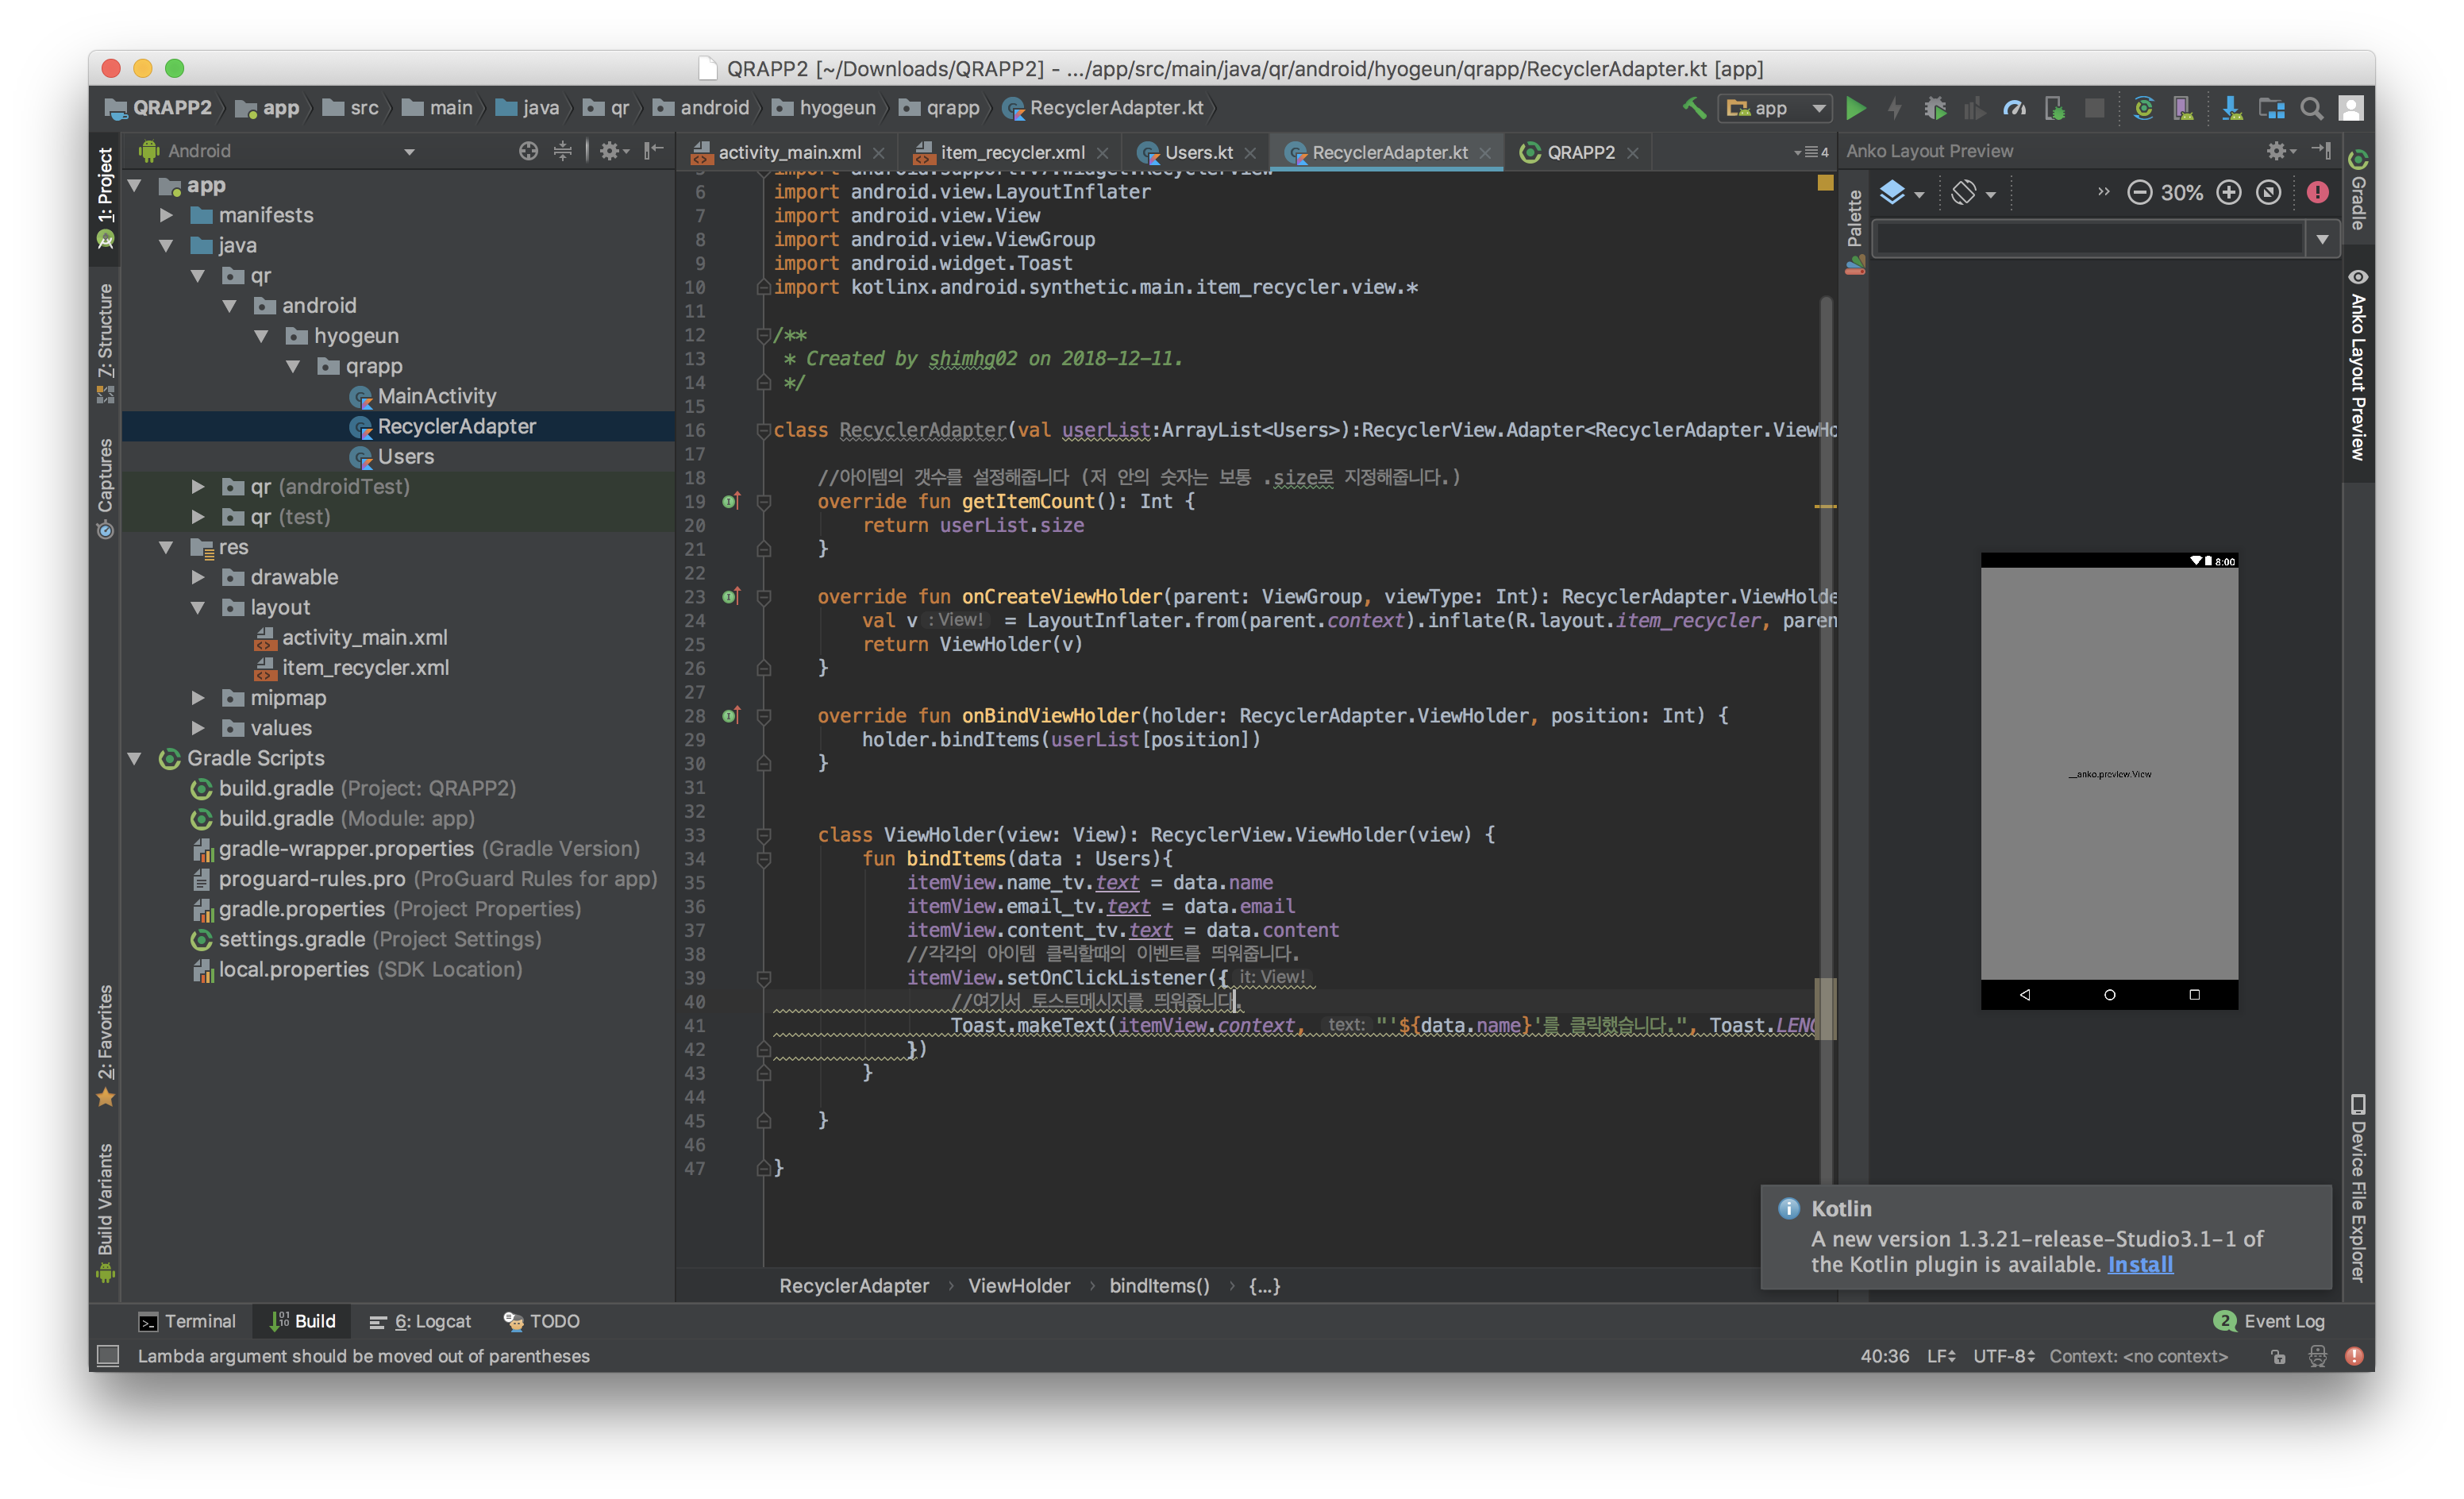
class RecyclerAdapter(val userList:ArrayList<Users>):RecyclerView.Adapter<RecyclerAdapter.ViewHolder>() {

    //아이템의 갯수를 설정해줍니다 (저 안의 숫자는 보통 .size로 지정해줍니다.)
    override fun getItemCount(): Int {
        return userList.size
    }

    override fun onCreateViewHolder(parent: ViewGroup, viewType: Int): RecyclerAdapter.ViewHolder {
        val v = LayoutInflater.from(parent.context).inflate(R.layout.item_recycler, parent, false)
        return ViewHolder(v)
    }

    override fun onBindViewHolder(holder: RecyclerAdapter.ViewHolder, position: Int) {
        holder.bindItems(userList[position])
    }


    class ViewHolder(view: View): RecyclerView.ViewHolder(view) {
        fun bindItems(data : Users){
            itemView.name_tv.text = data.name
            itemView.email_tv.text = data.email
            itemView.content_tv.text = data.content
            //각각의 아이템 클릭할때의 이벤트를 띄워줍니다.
            itemView.setOnClickListener({
                //여기서 토스트메시지를 띄워줍니다.
                Toast.makeText(itemView.context, "'${data.name}'를 클릭했습니다.", Toast.LENGTH_LONG).show()
            })
        }

    }

}
이렇게요!
그리고
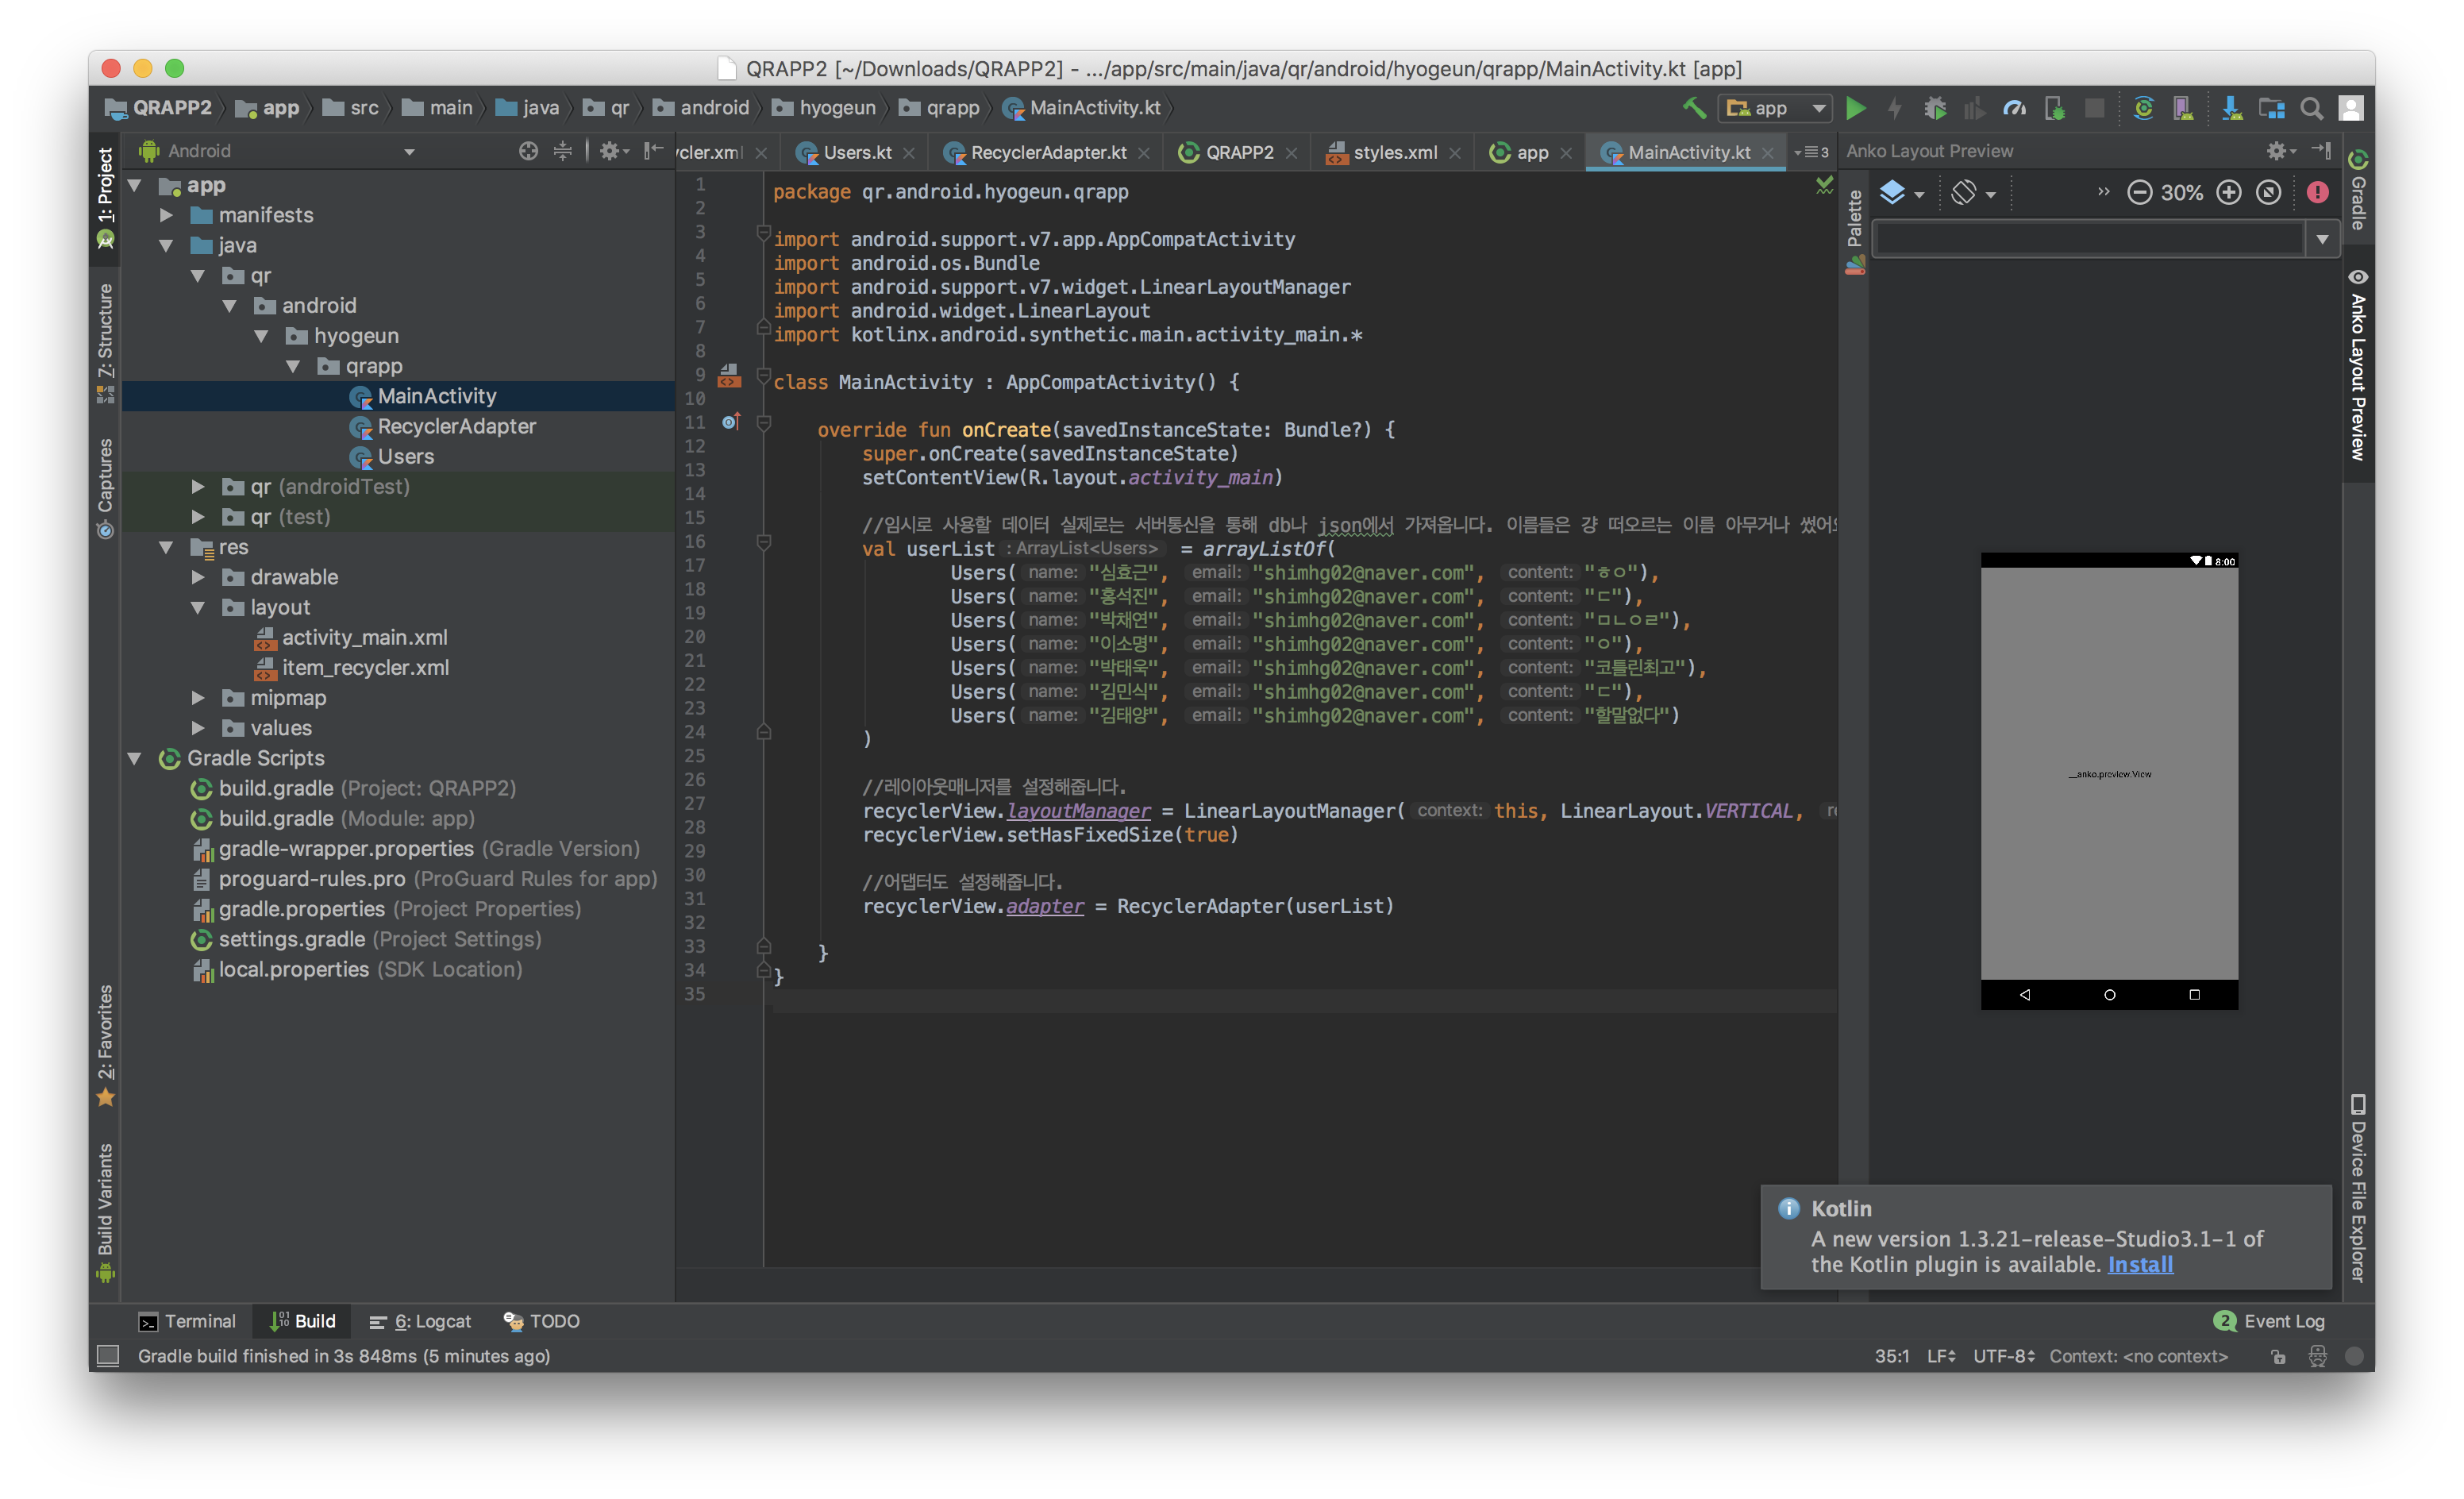
class MainActivity : AppCompatActivity() {

    override fun onCreate(savedInstanceState: Bundle?) {
        super.onCreate(savedInstanceState)
        setContentView(R.layout.activity_main)

        //임시로 사용할 데이터 실제로는 서버통신을 통해 db나 json에서 가져옵니다. 이름들은 걍 떠오르는 이름 아무거나 썼어요
        val userList = arrayListOf(
                Users("심효근", "shimhg02@naver.com", "ㅎㅇ"),
                Users("홍석진", "shimhg02@naver.com", "ㄷ"),
                Users("박채연", "shimhg02@naver.com", "ㅁㄴㄴㄴㄴㅇㄹ"),
                Users("한규언", "shimhg02@naver.com", "ㅁㄴㄹㅇㅇㅇㄹ"),
                Users("이소명", "shimhg02@naver.com", "ㅇ"),
                Users("박태욱", "shimhg02@naver.com", "코틀린최고"),
                Users("박서연", "shimhg02@naver.com", "ㅁㄴㅇㄹㅁㄴㅇㄹ"),
                Users("김민식", "shimhg02@naver.com", "ㄷ"),
                Users("김태양", "shimhg02@naver.com", "할말없다"),
                Users("최성희", "shimhg02@naver.com", "나는 킹갓이다")
        )

        //레이아웃매니저를 설정해줍니다.
        recyclerView.layoutManager = LinearLayoutManager(this, LinearLayout.VERTICAL, false)
        recyclerView.setHasFixedSize(true)

        //어댑터도 설정해줍니다.
        recyclerView.adapter = RecyclerAdapter(userList)

    }
}
라고 MainActivity도 만들어줘요!
한번 실행해 볼까요?
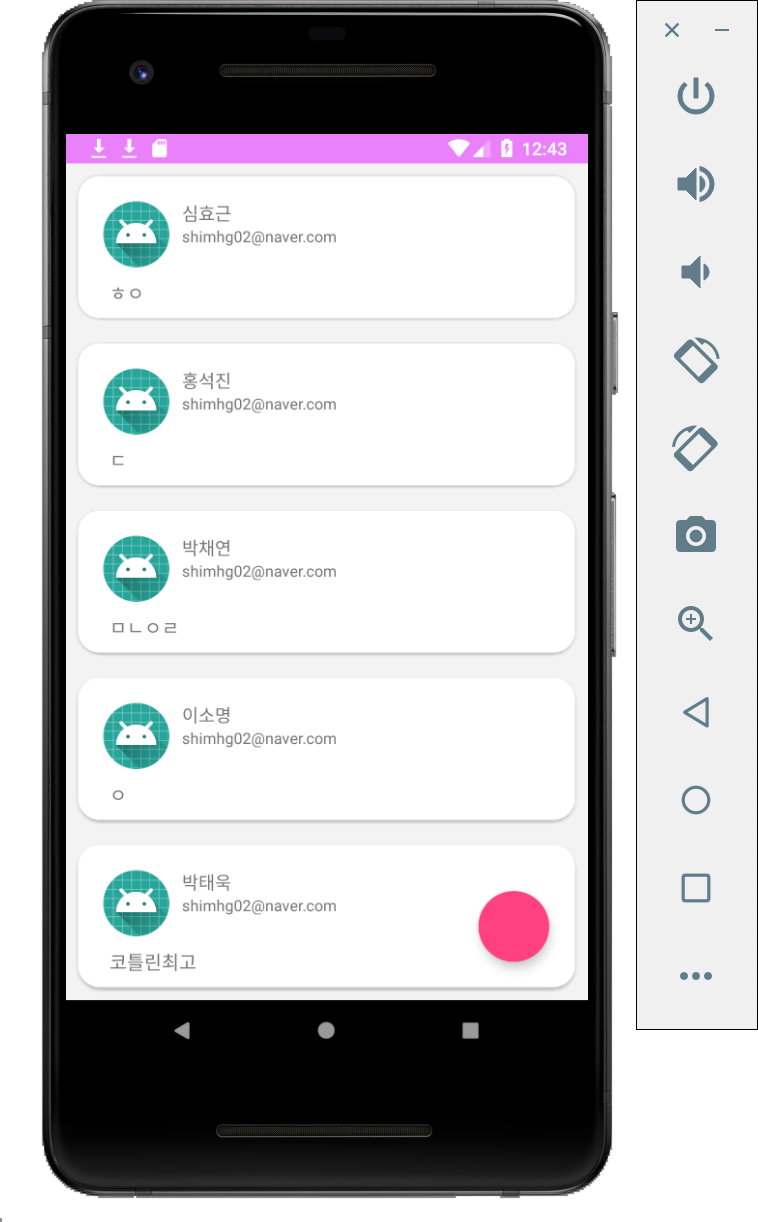
정상적으로 실행되는군요!
그리고 한번 클릭해볼까요?

'김민식'이란 아이템을 토스트로 잘 띄워주는군요!!
뭔가 ListView랑 비슷한데 다른점이 있죠?
리사이클러뷰랑 리스트뷰의 극단점 차이점은 역시 성능면이라 하하...
뭐 어쨌든 오늘 하루도 수고하셨습니다!
부족한 글이지만 항상 열심히 봐주셔서 정말 감사드려요!
'Android > Android Lecture' 카테고리의 다른 글
| 12. Retrofit 서비스와 로그인! 그리고 SharedPref! (25) | 2019.07.24 |
|---|---|
| 안드로이드 강의 11. 머티리얼 디자인이란? (1) | 2019.04.11 |
| 안드로이드 강의 9. TabLayout & ViewPager 와 BaseActivity사용 (0) | 2019.04.10 |
| 안드로이드 강의 8. Fragment를 사용하자! (4) | 2019.04.09 |
| 안드로이드 강의 7. ListView 사용법과 CardView레이아웃! (2) | 2019.04.09 |


